How to Recall an Email in Outlook: 10 Second Guide With Print Screens
How many times have you been in a situation to recall Outlook message because of misspelling, grammar, or you’ve sent an email to the wrong recipient, even worse to the wrong department, even forgotten to include a necessary attachment or you’ve simply sent an unfinished email? Hopefully not too many, since it can be quite embarrassing, but if you use Microsoft’s e-mail client, every day, you definitely need to know how to unsent email in Outlook. This article explains the step-by-step procedure to unsent mistakenly sent emails. The process is effortless and with print screens attached below, you’ll easily unsend email on the desktop version of the most popular business email app. Instructions below work for Office 365 and following Outlook versions for Windows and Mac users: 2019, 2016, 2013, 2010, and 2007. NOTE: Lately, all email clients (newest versions) can recall already sent message, regardless if they are meant for desktop or phone usage. Steps are very similar, and once you learn how to do it in Outlook, you’ll easily manage to do it in Gmail or similar apps or cloud solutions.Steps to Recall Outlook Email (or Replace)
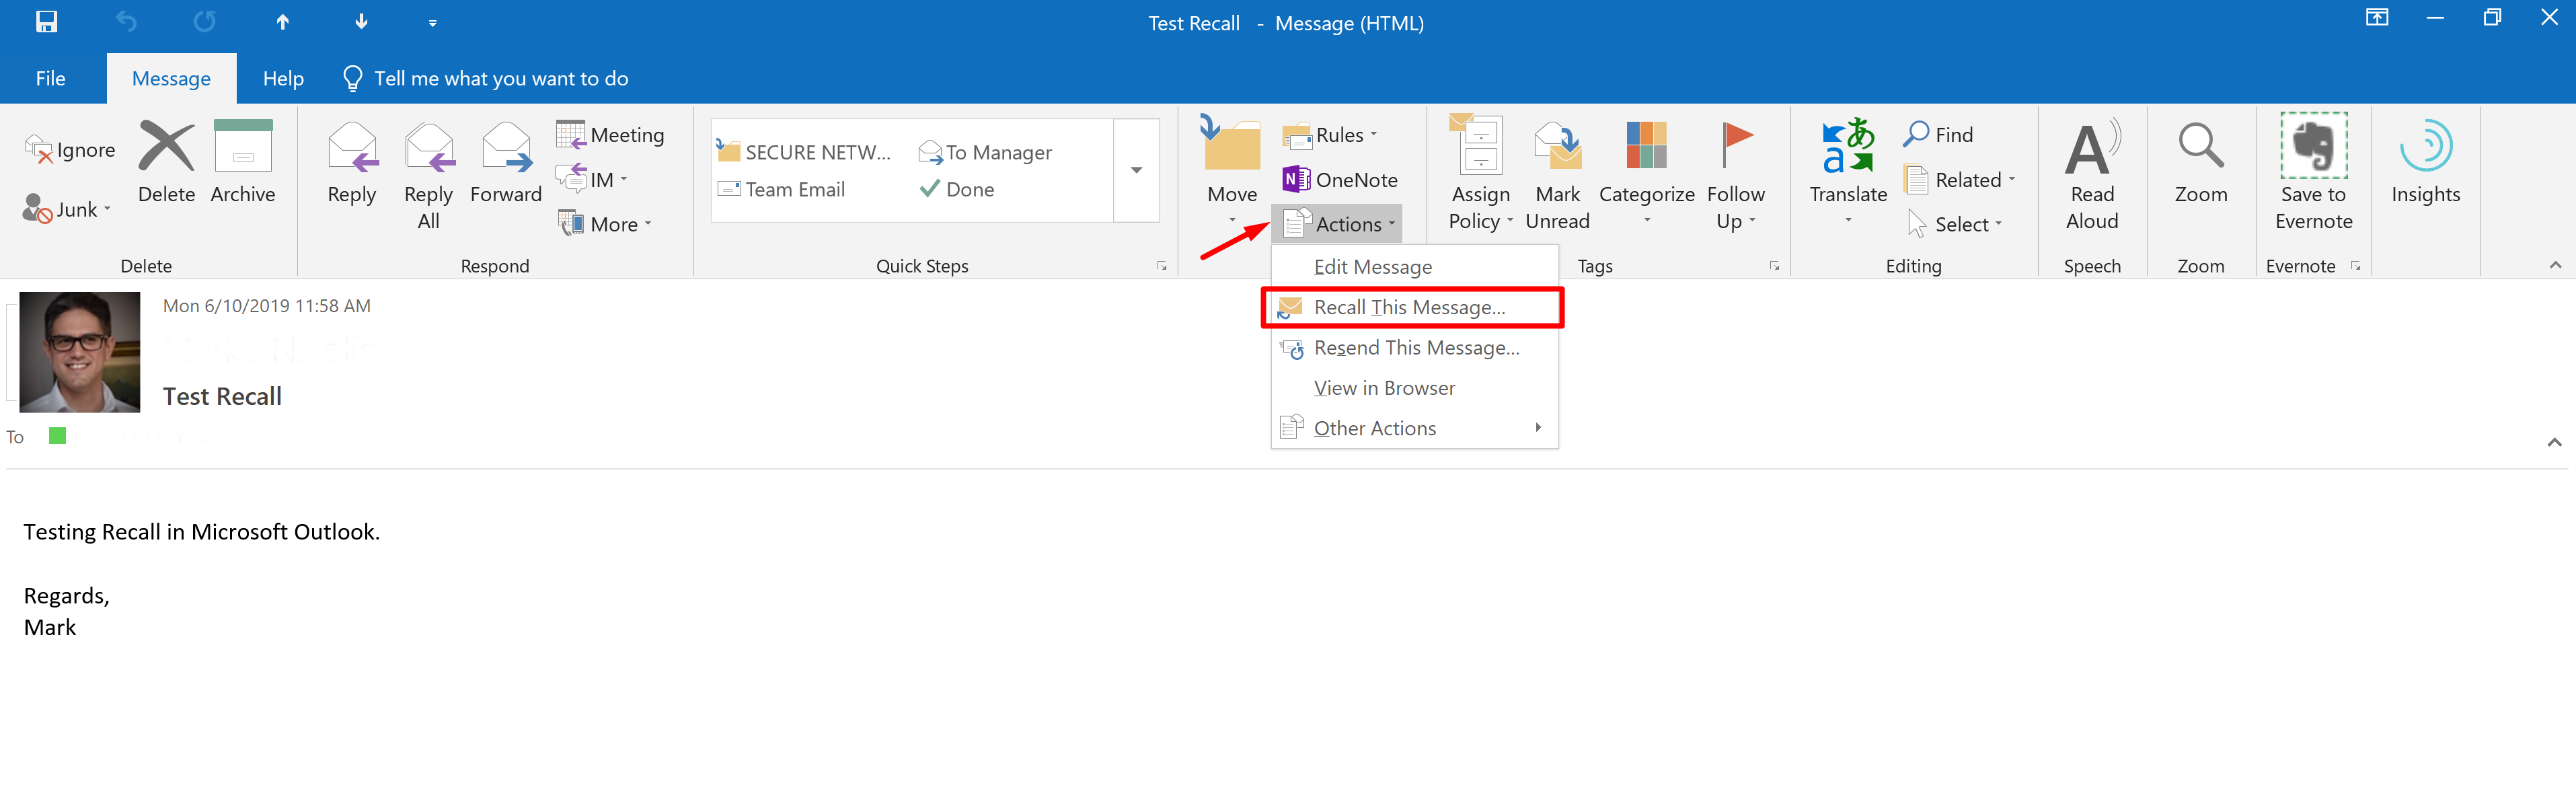
1. Go to SENT items, find the email you want to recall from Outlook and double click to open 2. Navigate to MESSAGE tab, click on ACTIONS dropdown and choose RECALL THIS MESSAGE
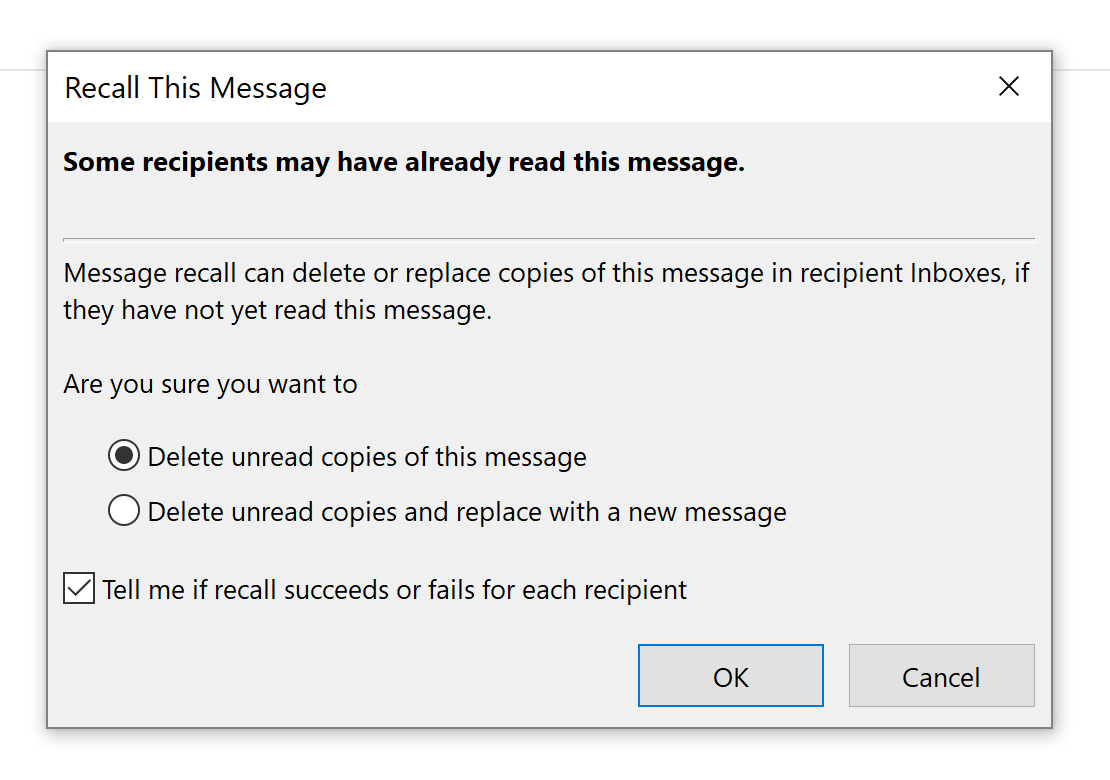
3. When the new window pops up, you’ll have two options to choose from.
- Delete unread copies of this message
- Delete unread copies of this message and replace with a new one
And that is all, three simple and straightforward steps to recall email.
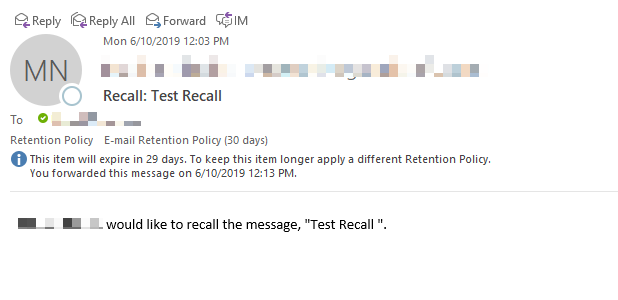
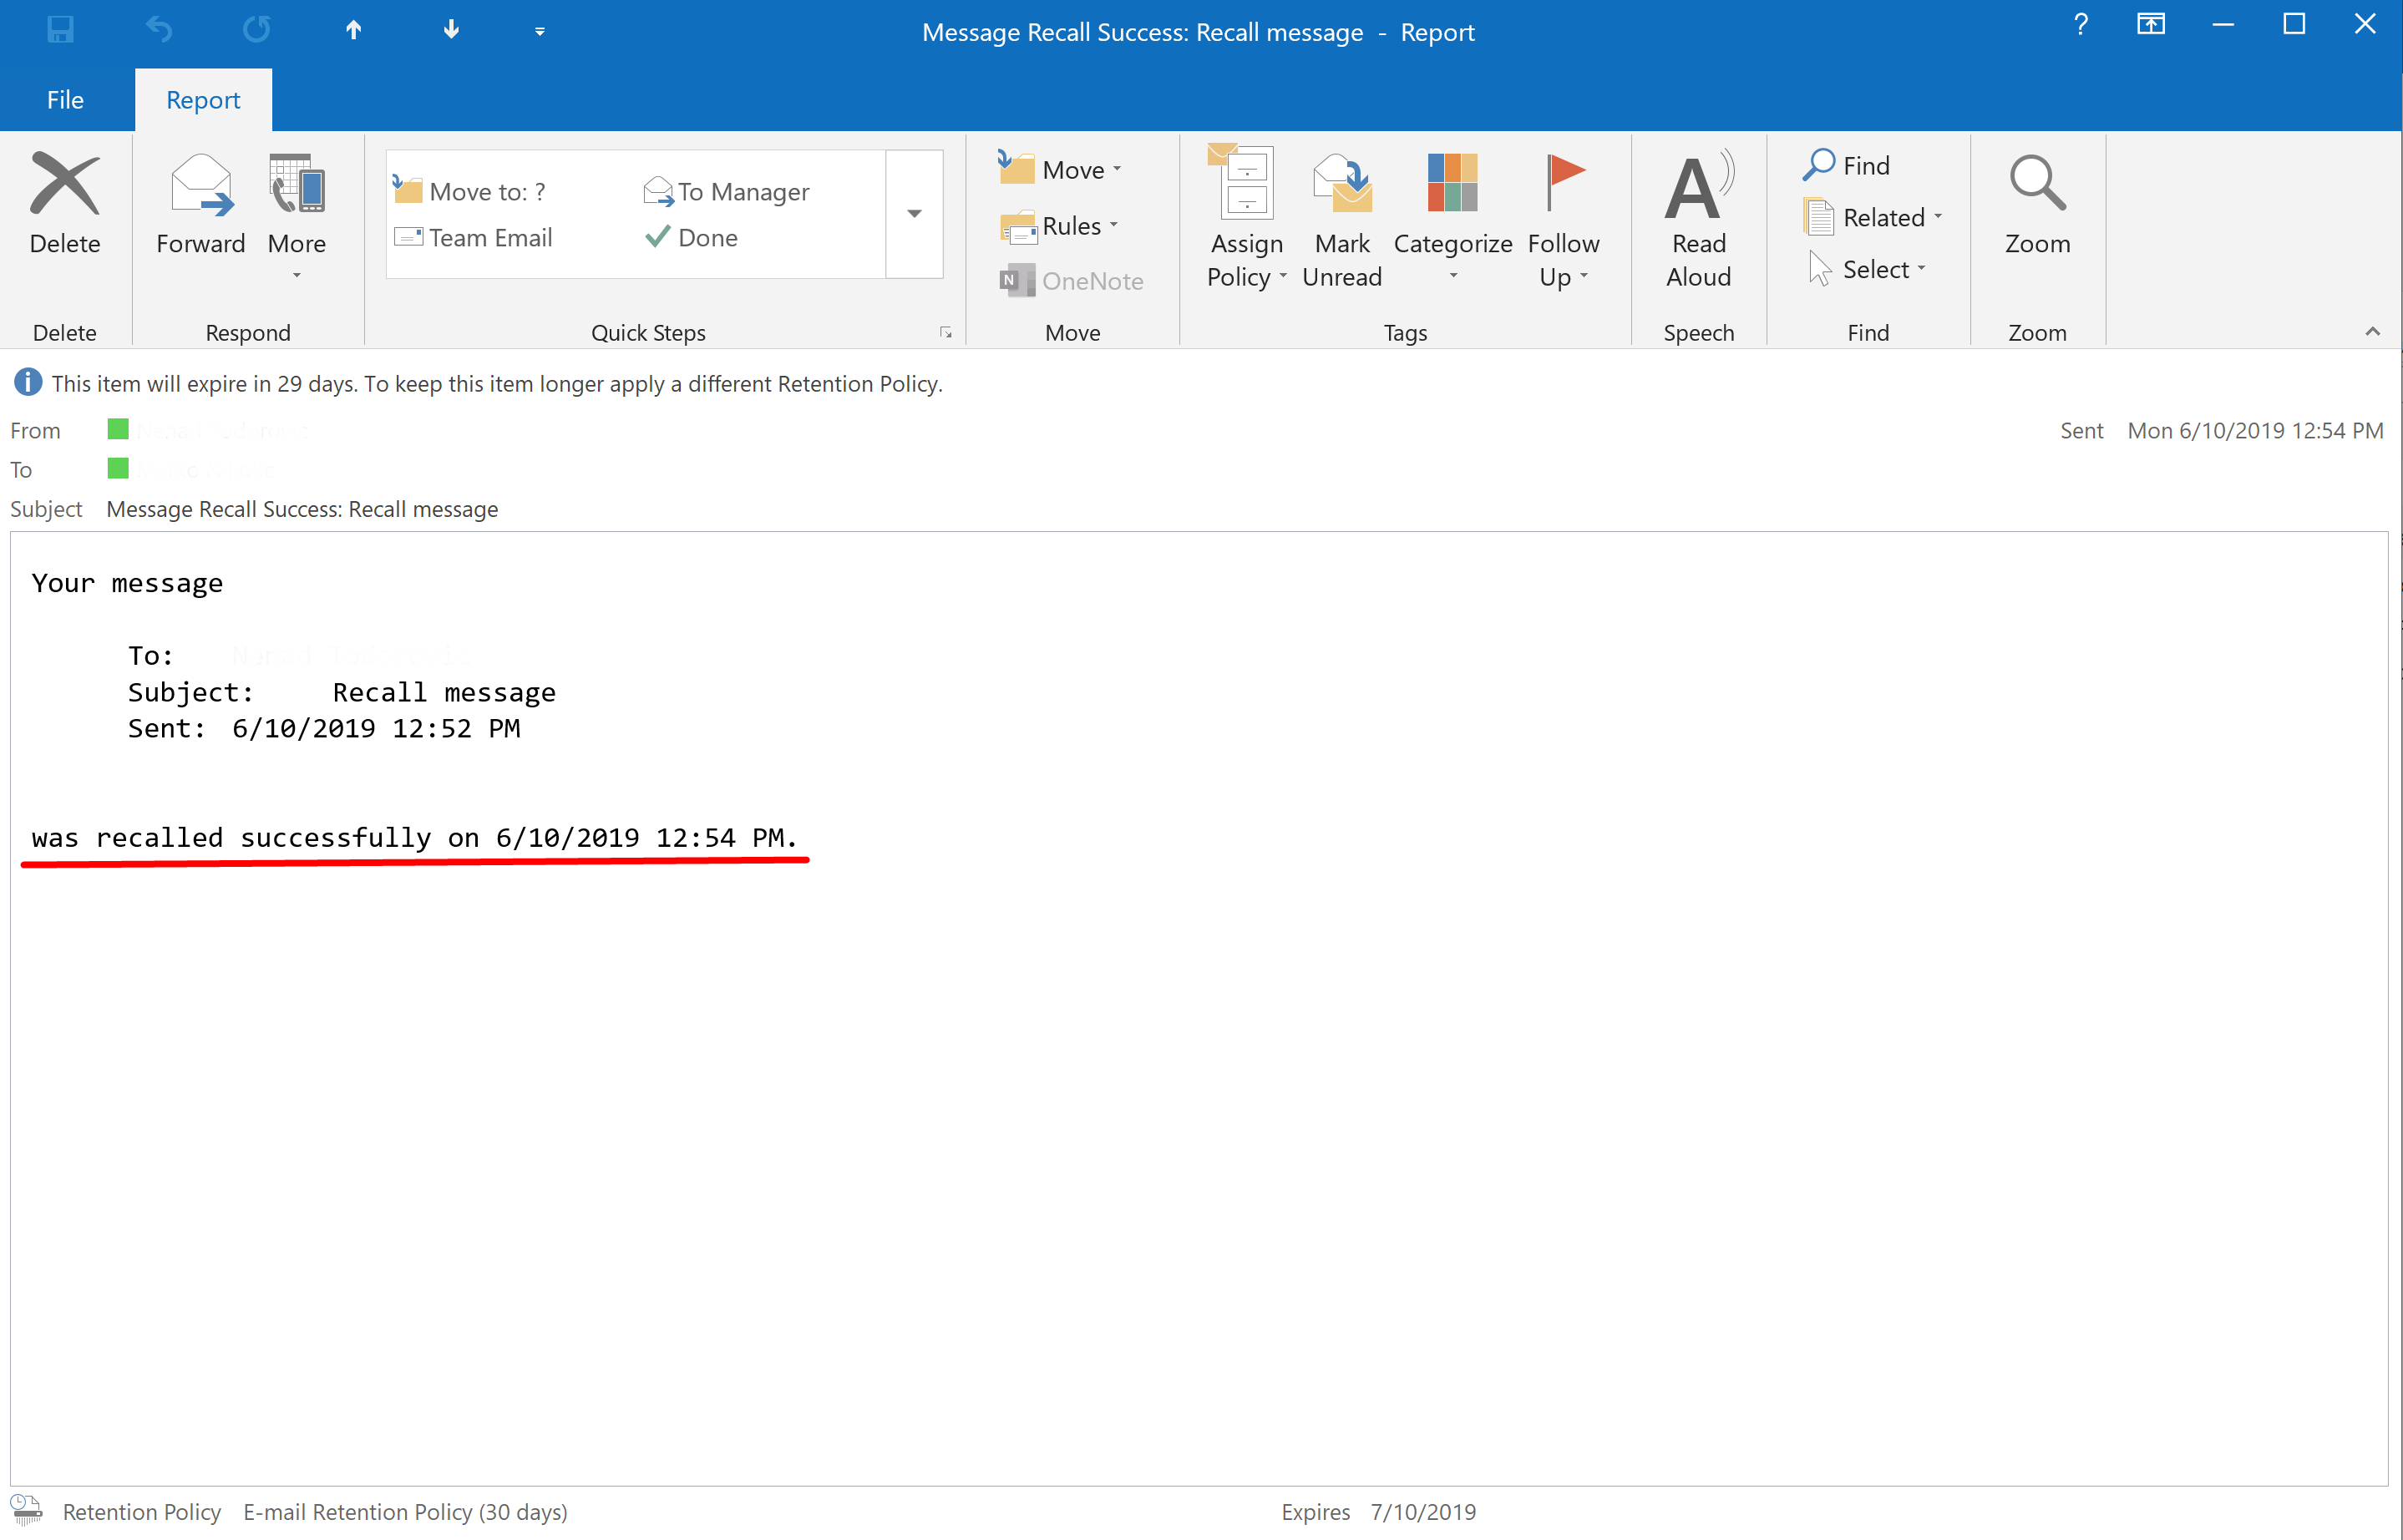
NOTE: In some situations, the recipient can receive an email that you want to recall an Outlook message. And it looks like on the print screen below.
When Recall Email Outlook Feature Will Work?
Some rules need to be fulfilled to successfully unsent email.- First and most important, recalling an email in Outlook works only within the same organization or the same Microsoft Exchange account. What does it mean? Recalling won’t work between Gmail and your business email account. Once a message is out of your email server, it’s out of your control too.
- The same email apps - Even if you and your recipient use the same Exchange server, you both need to use Outlook. If one side added an account through Gmail app forget about recalling
- Be fast – if the email is already open than recalling is not going to happen. That is why you need to be quick and unsent email within few seconds after hitting the Sent button
- If some rule applies to email, like redirects to other folders, spam filters, or email goes to automatic sorting filter and add-ins, then recall will fail as well.
- Mobile Outlook applications – Sometimes, if your phone is offline and you use Exchange ActiveSync option in the mobile app can lead to the unsuccessful recall of email due to different Outlook version that server needs to synchronize
- Azure Information Protection (AIP) protects messages from recalling
- Shared folders – if your recipient uses public folders or shares email account that can affect recall.
What to do When Email Recall Fails?
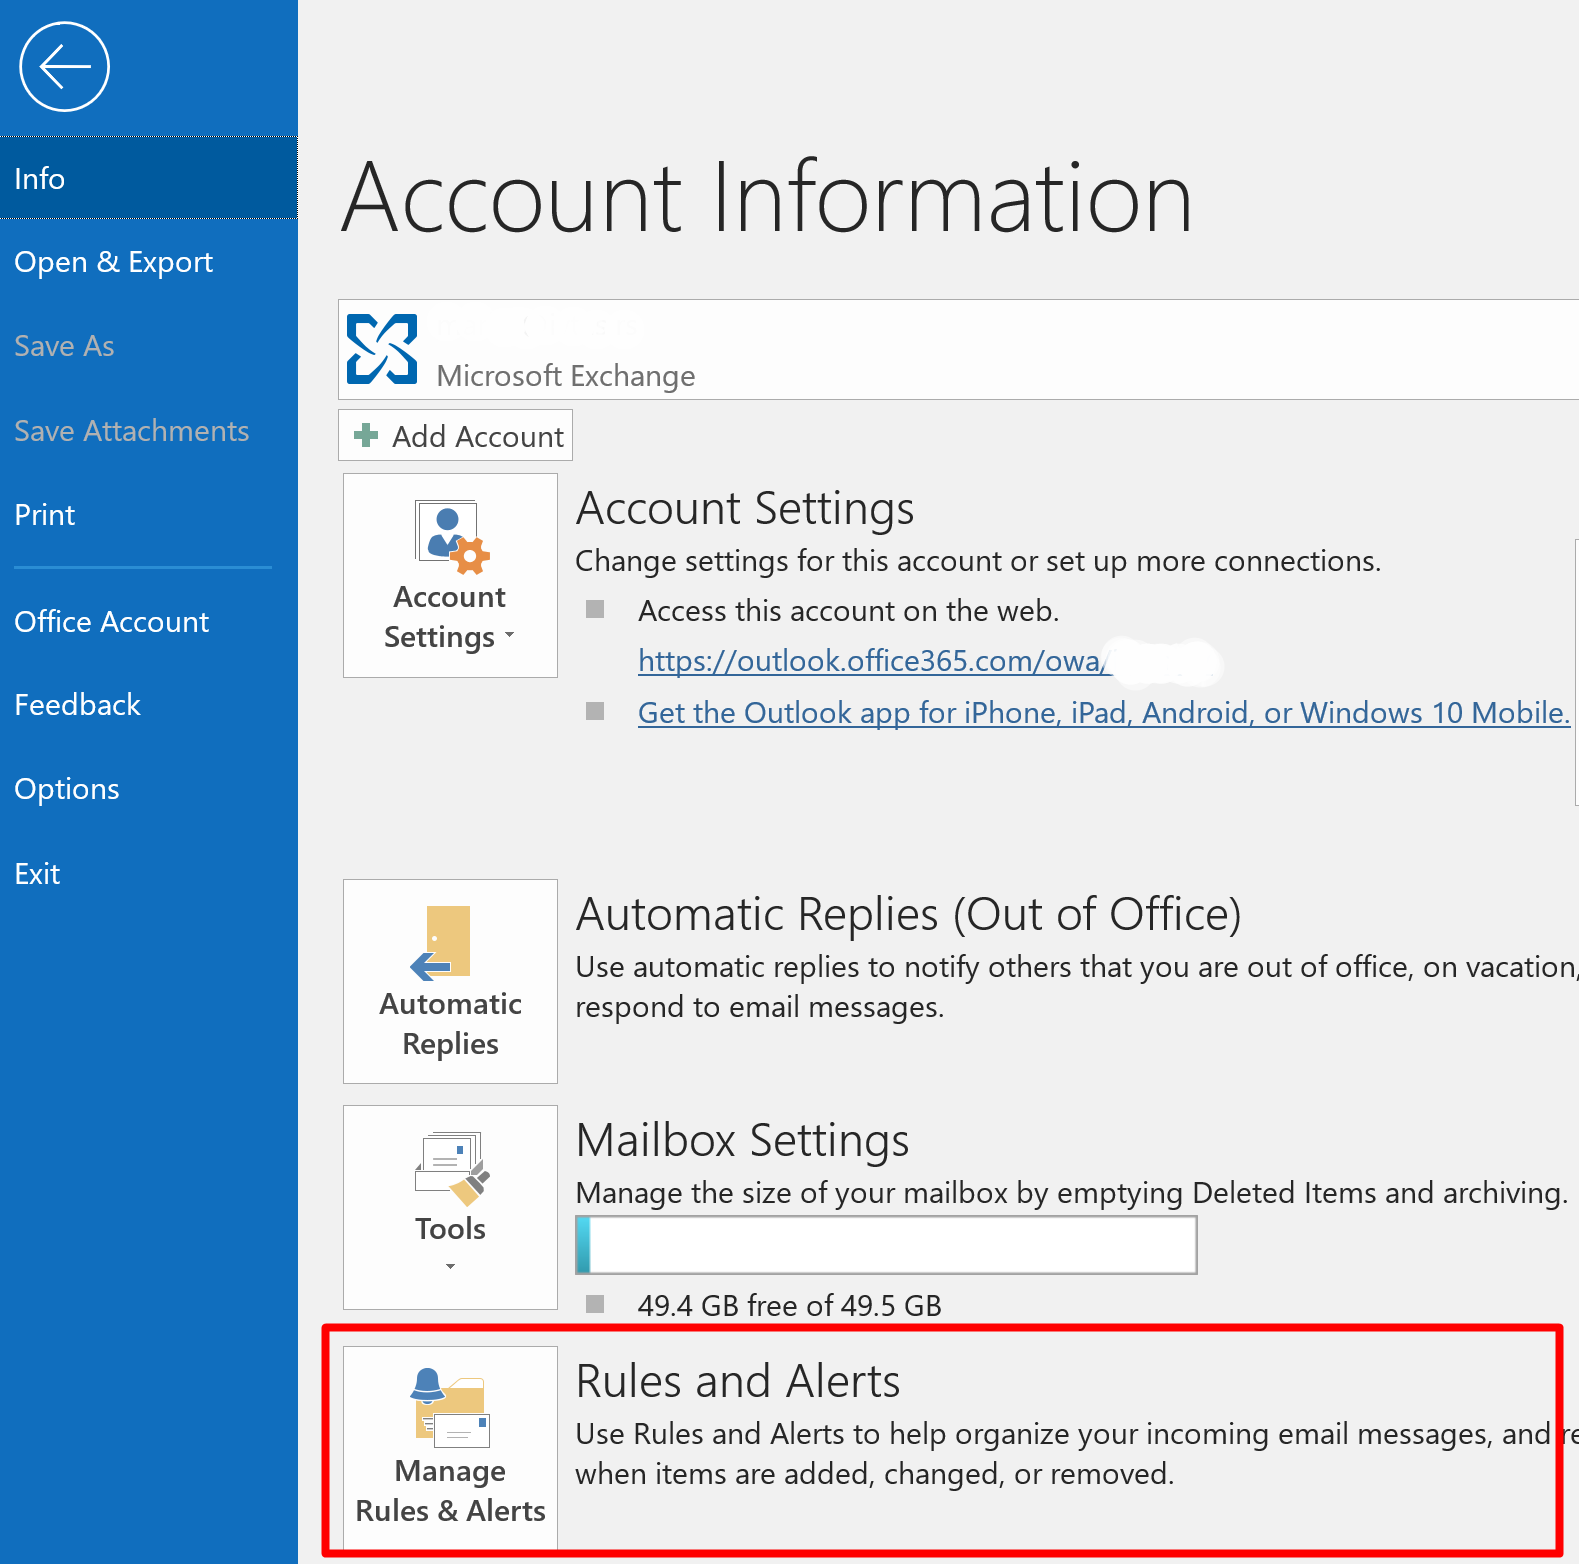
Say I’m Sorry One honest I’m sorry, will make things better. Write an apology email, explain what happened, give a clear next step, and ask for forgiveness. Delay emails, best recall alternative Consider delaying emails if you find your self making too many mistakes. Create a simple rule, in a few easy steps, and that way organize better and recall Outlook emails efficiently.- Press FILE and open RULES AND ALERTS
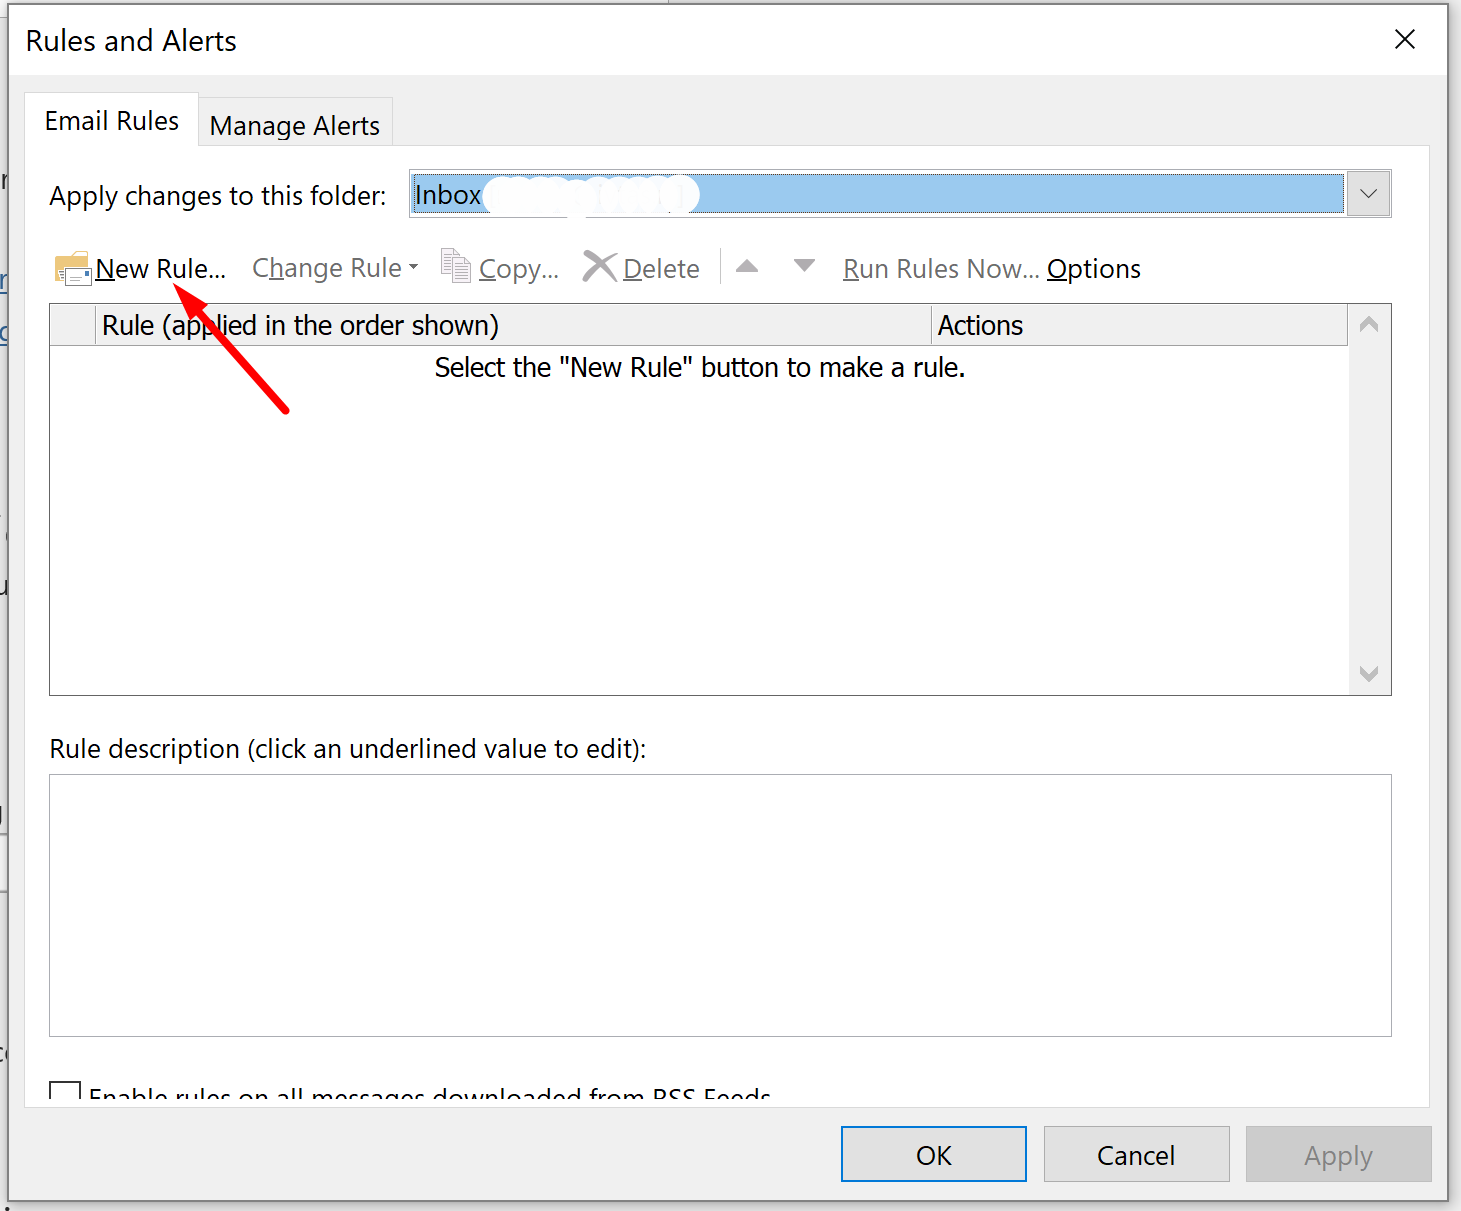
- Click NEW RULE tab
- Then press Apply Rule on Message I Send
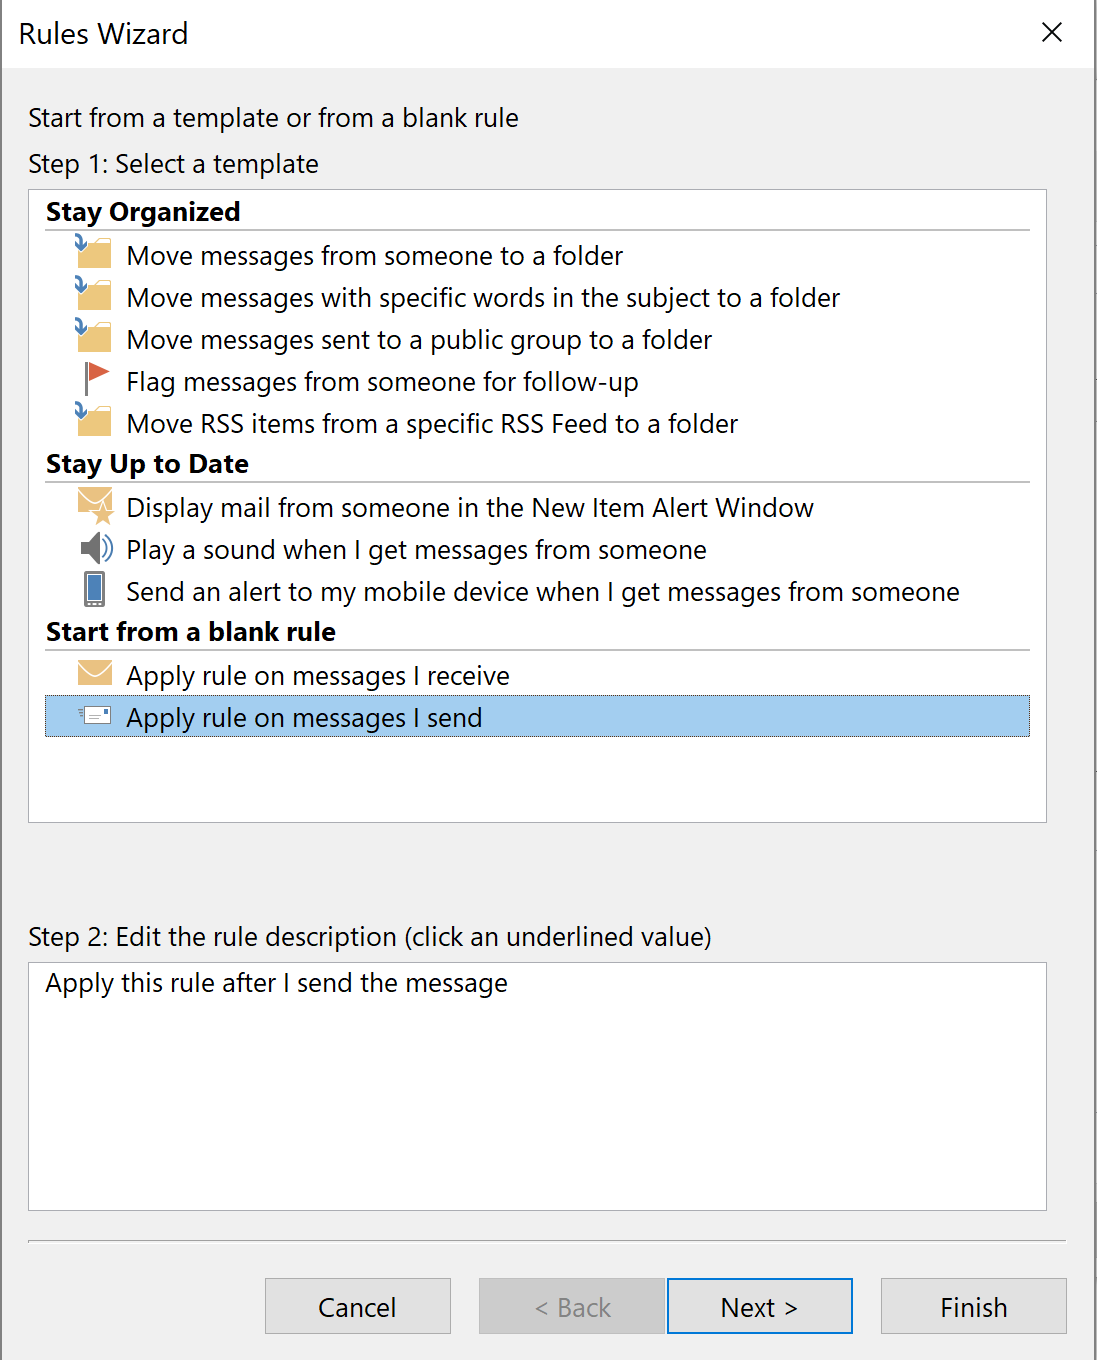
- Click Next and skip all conditions to apply the new rule to all emails.
- Now click Defer Delivery by a minute (choose number of minutes), see image below. Click OK.
